Bacon-Wrapped Jalapeño Poppers


What do you get when you mix Delicious Jalapeños + Naturally Smoked Bacon + Homemade Paprika Cream Cheese? A Mouth-Watering, easy-to-make Appetizer that is the perfect addition to any meal, gathering, or event!

BWJ 4 IMG_8689wm (1).jpg

Ingredients:

  • 7 Jalapeños

  • Blue Danube Naturally Smoked Side Bacon - 1 pkg

  • Blue Danube Homemade Körözött Cream Cheese - 1 small container

JP-RECIPE1.jpg

Directions:

1. Pre-heat oven to 400 F.

2. Wash Jalapenos. Cut them in half lengthwise. Scrape out seeds and white rind.
Pro Tip: For a spicier Jalapeño Popper, leave some seeds inside the pepper for extra zing! If you want a Popper on the mild side, be sure to scrape out all seeds and rind.

3. Pat Jalapeños dry. Add salt and pepper.

JP-2.jpg

4. Spread Blue Danube Körözött Cream Cheese into Jalapenos.
Pro Tip: Wipe off the edges with a paper towel to clean up the appearance of the Jalepeños.

J-POP3.jpg

5. Cut slices of Blue Danube Naturally Smoked Bacon in half lengthwise. I find that cutting the bacon in half allows for it to cook faster in the oven to match the cook time of the Jalapeños.

6. Wrap the bacon slice around the Jalapeño Popper. In my recipe, I used one half bacon slice per Jalapeño Popper. However, if you want a more Meaty Popper, I recommend wrapping 1 half slice around the Jalapeno and then wrapping a second half piece around it as well.
Pro Tip: To ensure that the Smoked Bacon slices stay in place, use the Körözött Cream Cheese as a glue to hold it down. You can also try to tuck the ends of the bacon underneath the Jalapeño to hold into place. You can also secure Jalapeños with toothpicks if necessary.

7. Lay Jalapeños onto a baking tray with aluminum foil.

jp-4.jpg

8. Cook for 20 minutes.

Take tray out of the oven, plate Jalapeños, and enjoy!!

JP-5.jpg
 

Rakott Krumpli


A Delicious Traditional Hungarian Dish loaded with All Natural Meats, Eggs, and Potatoes. This recipe is the perfect comfort food for Ontario’s cold winter days!

RK-6.jpg

Ingredients:

  • Blue Danube Naturally Smoked Turista Salami - 1 chunk approx. 300gr. (not sliced)

  • Blue Danube Naturally Smoked Polish Sausage - approx. 300gr

  • Blue Danube Naturally Smoked Debreceni Sausage - 1-2 pcs depending on how much meat you would like in your dish. I used 1 piece of Hot Debreceni to add some extra kick!

  • Optional: Blue Danube Homemade Bread Crumbs for the top layer.

  • Eggs - Approx. 8 depending on your personal preferences.

  • 5-6 White Potatoes

  • 1 lbs Sour Cream

  • 1 lbs Butter for Sauce + 1 small Piece of Butter to coat casserole dish

  • Salt and Pepper

RK-1.jpg
RK-2.jpg

Directions:

1. Pre-heat oven to 340 F.

2. Boil water in a large pot on the stove.

3. Once water is boiled, add in eggs and potatoes (skin-on) to boil together. Boil until potatoes are semi-soft.
Pro Tip: If the potatoes are boiled for too long and become too soft, they will be very difficult to peel and slice. Remember that we are baking this dish after it’s put together, so a semi-soft potato is perfect!

4. When finished, remove potatoes and eggs from boiling water and let cool for at least 5 minutes.

5. In the meantime, cut up your meat! Cut Blue Danube Debreceni and Blue Danube Polish sausages into circles. Cut Blue Danube Turista salami into small chunks.

6. Once the eggs and potatoes are cooled down, remove the shells of the eggs and slice into circles. Then, remove the skin on the potatoes and slice into circles. Add salt and pepper to both.
Pro Tip: Make sure that you use a very CLEAN knife when slicing your hard boiled eggs, or the yolk will get stuck on your knife, creating a messy egg slice. I like to put some Avocado Oil on a paper towel and run it over the knife when I feel that the knife is getting too sticky.

7. Get a large casserole dish and spread some softened butter on the bottom as your first layer.
Pro Tip: I personally like to use a large and shallow casserole dish for this recipe so that there is a large surface area with fewer layers.
Pro Tip: Leave a small piece of butter out of the fridge for at least 20 minutes. This way, you can easily spread the soft butter onto the bottom of the casserole dish to create a perfect butter coat.

8. Potato Layer - Spread sliced and seasoned potatoes into the casserole dish as your first layer. Spread thickly enough that you can’t see the bottom of the dish.

9. Meat Layer - Add a layer of all three meats combined. I like to spread the meat layer out a bit so that you can still see the potatoes underneath, but this is totally up to you!
Pro Tip: I like to add in each meat one at a time, keeping in mind that there will be three meats in total to create one layer. I personally like to go heavy on the Turista Salami because it is my favourite!

RK-4.jpg

10. Egg layer - Add a layer of seasoned eggs! Depending on your personal preferences, layer as many eggs as you want on top of the meat layer. I like to spread it out while still leaving some space between the eggs.

RK-5.jpg

11. Potato Layer - Add a later of potatoes similar to the layer you began the dish with.
Pro Tip: The amount of layers you have in your Rukott Krumpli depends on the size of your casserole dish. Again, I used a large and shallow casserole dish so I did two full layers (potato, meat, eggs) and topped with a layer of potatoes at the very end.
However you chose to make your dish, remember to put aside enough potatoes to create a layer to top the entire casserole with.

12. Meat Layer.

13. Egg Layer.

14. Final Potato Layer! After you are satisfied with the height of your casserole, top the entire Rukott Krumpli with a nice layer of potatoes. I personally like to keep my top potato layer rather light, as I am not a huge fan of potatoes! But again, this is up to you.

15. It is now time to make the Rukott Krumpli sauce that, in my opinion, is the entire essence of this recipe!
How to:
- Microwave - Put 1 lbs butter in a microwavable bowl and heat until
melted. Let butter cool down for about 10 minutes.
Butter must not be boiling or hot!! Your butter is ready for the next step
when it is liquid, but cooled down enough that it actually feels cool to
the touch.
- Add in 1 lbs of sour cream and mix with a spoon. Mix
butter and sour cream until they are fully blended.


- Stove - In a small sauce pan, heat 1 lbs butter at a low temperature until
melted
- Once butter is melted, turn off heat and let cool. Butter must not
be boiling or hot when mixing in the sour cream!!
Your butter is ready
for the next step when it is liquid, but cooled down enough that it
actually feels cool to the touch.
- Mix in 1 lbs of sour cream with a spoon. Mix butter and sour cream
until they are fully blended.

The consistency that you are looking for when your butter and sour cream are successful mixed together is a rather creamy, white mixture. I recommend stirring for at least one minute.

Pro Tip: If your butter is too hot, the butter with curl when you add the sour cream! I highly recommend that you physically feel your butter’s temperature before adding in the sour cream.

Once fully blended, your Rukott Krumpli sauce is ready to use!

16. Pour Sauce over the top layer of your casserole. Make sure to pour slowly and evenly to ensure that you are covering the entire surface area. The sauce will seep into the previous layers while it is baking to create a delicious coat throughout the dish.
Pro Tip: If you like a really saucy casserole, you can use 1.5 lbs of butter and 1.5 lbs of sour cream and pour 1/3 of the mixture onto your first complete Rukott Krumpli layer (after your second layer of potatoes is added).

17. Optional: Sprinkle a thin layer of Blue Danube Homemade Bread Crumbs on the top of your dish. If you are doing this, I recommend that you allow your dish to bake in the oven uncovered for at least a few minutes.

18. Put Rukott Krumpli in the oven, uncovered, for approx 30 minutes.
Pro Tip: You can also bake the Rukott Krumpli at a higher temperature, covered. I prefer to keep it uncovered and at a lower temperature. If you are choosing to cover your Rukott Krumpli, I would recommend taking off the cover for the last few minutes to crisp up the top layer (especially if you are using bread crumbs!). Remember that the ingredients in the Rukott Krumpli are already cooked, so you can play around with your oven settings depending on how much time you have to cook the dish.

19. Remove from oven and let sit for a few minutes before serving. If you serve the dish while it is too hot, the ingredients are more likely to fall apart when plated.

Plate, serve, and enjoy!

RK-6.jpg
 

The Deluxe Charcuterie Board


Not only does our Deluxe Charcuterie Board look fantastic, but it also tastes great! Sure to impress all of your guests, the Deluxe Charcuterie Board offers a great assortment of wonderful flavours and textures with something for everyone to enjoy!

DCB-1.jpg

Ingredients:

  • Blue Danube Mild Wild Boar Csabettes - 2 pieces
    Substitution: Blue Danube Pork Csabettes (Mild, Hot, Garlic, Jalapeño or Peppercorn), Blue Danube Chicken Csabettes (Mild, Hot), Blue Danube Beef Csabettes (Mild, Hot), Blue Danube Mild Turkey Csabettes, Blue Danube Wild Boar Csabettes (Hot), Blue Danube Elk Csabettes (Mild, Hot), Blue Danube Kangaroo Csabettes (Mild, Hot), Blue Danube Venison Csabettes (Mild, Hot), Blue Danube Water Buffalo Csabettes (Mild, Hot)

  • Blue Danube Mild Csabai Salami - 1 package pre-sliced
    Substitution: Blue Danube Hot Gyulai Salami, Blue Danube Csemege Salami

  • Blue Danube Dry Cured Pork Back Bacon - 1 package pre-sliced

  • Blue Danube Flat Pork Shinken - 2 packages pre-sliced

  • Blue Danube Homemade Teli Salami - 1 package pre-sliced

  • Blue Danube Hot Gyulai Sausage - 1 piece
    Substitution: Blue Danube Mild Csabai Sausage, Blue Danube Double Garlic Csabai Sausage

  • Blue Danube Double Smoked Cheddar Cheese - One piece approx. 200 grams

  • Optional: Blue Danube Homemade Körözött cream cheese - approx. 1/2 small container

  • Havarti/ Flavoured Havarti Cheese - One piece approx. 200 gr

  • Brie Cheese - Approx. half of one wheel

  • Goat Cheese/Flavoured Goat Cheese - 1 small package

  • Almonds - Approx. 1 small bowl full

  • Walnuts - Approx. 1 small bowl full

  • Olives - Approx. 1 small bowl full

  • Pickles - 2-3

  • Green Grapes - 1 bunch

  • Asparagus - Approx. 16 pc

  • Grape Tomatoes - Approx. 1 handful

  • Orange Bell Pepper - 1/2 a large pepper

  • S & F Pepperoncini - 4-8pcs

  • That Mustard Sauce - 1 small bowl full

  • Dried Apricots - 1 handful

  • Celery - 1-2 stalks

  • Baguette - 1 long piece

  • Crackers - 1/2 box

DCB-2.jpg

Directions:

1. Select a board that is large enough to serve your guests and hold all of the ingredients.
Also, select at least 5 small bowls or containers that you will also be putting onto your board, as well as 1 small cheese knife and 1 small spoon.
If you do not have a board big enough, the small 5 bowls can go on a separate tray or board.
I typically like to put my bread and crackers onto a separate serving tray as well so that I can fully maximize the space on my board. However, this is totally up to you!

Meat Products:

2. Open up package of Blue Danube Dry Cured Neck and layer it flat onto board.
Pro Tip: I ALWAYS add all of the meat ingredients onto my Charcuterie Boards first!! On the boards that I make for family, friends, and clients, the focus is on the meat products, so I always ensure that all of the meat I want to add can fit onto the board. I recommend that you add the items that are most important to you first!
Pro Tip: I like to add the Dry Cured Neck first because it takes up a larger piece of space and, in my opinion, is the prettiest looking. I like to lay the Dry Cured Neck out flat and layer slices on top of it. I typically put this item on the corner of my board.

3. Open up package of Blue Danube Dry Cured Back Bacon. Lay flat and layer onto board. I usually like to put the Dry Cured Back Bacon in two separate areas on the board (see finished picture for further details).

4. Open up 1 package of Blue Danube Shinken Spec Flat (the other package will be used for the Shinken-Wrapped Asparagus). Fold Shinken in half and layer onto board.

5. Open up package of Blue Danube Teli Salami. Fold salamis in half and either layer or fan them out onto the board. I like to do several layers of Teli Salami on my board as it is one of my favourite ingredients! (See finished picture for further details)

6. Open up package of Blue Danube Csabai Salami. Fold salamis in half and either layer or fan them out onto the board.

7. Cut up Blue Danube Gyulai Sausage into rings. Place onto board in one large bunch.

8. Open up package of Blue Danube Mild Wild Boar Csabettes and cut up at least 2 pieces into little bits.
Pro Tip: I like to put the Csabettes bits into a small bowl on top of the board in order to keep them organized. If you have different sizes of bowls, then use a larger one for this.
Add bowl of Csabettes onto the board.

9. Add Shinken-Wrapped Asparagus onto the board. I have included the instructions on to make these at the end of this recipe!
Pro Tip: I like to put the Asparagus on the corner of my board and stack it as high as I can.

Bowls:

10. Now it’s time to add the rest of the bowls!
Fill one small bowl with olives. If you have different sizes of bowls, use a larger one for this.
Place bowl onto board.

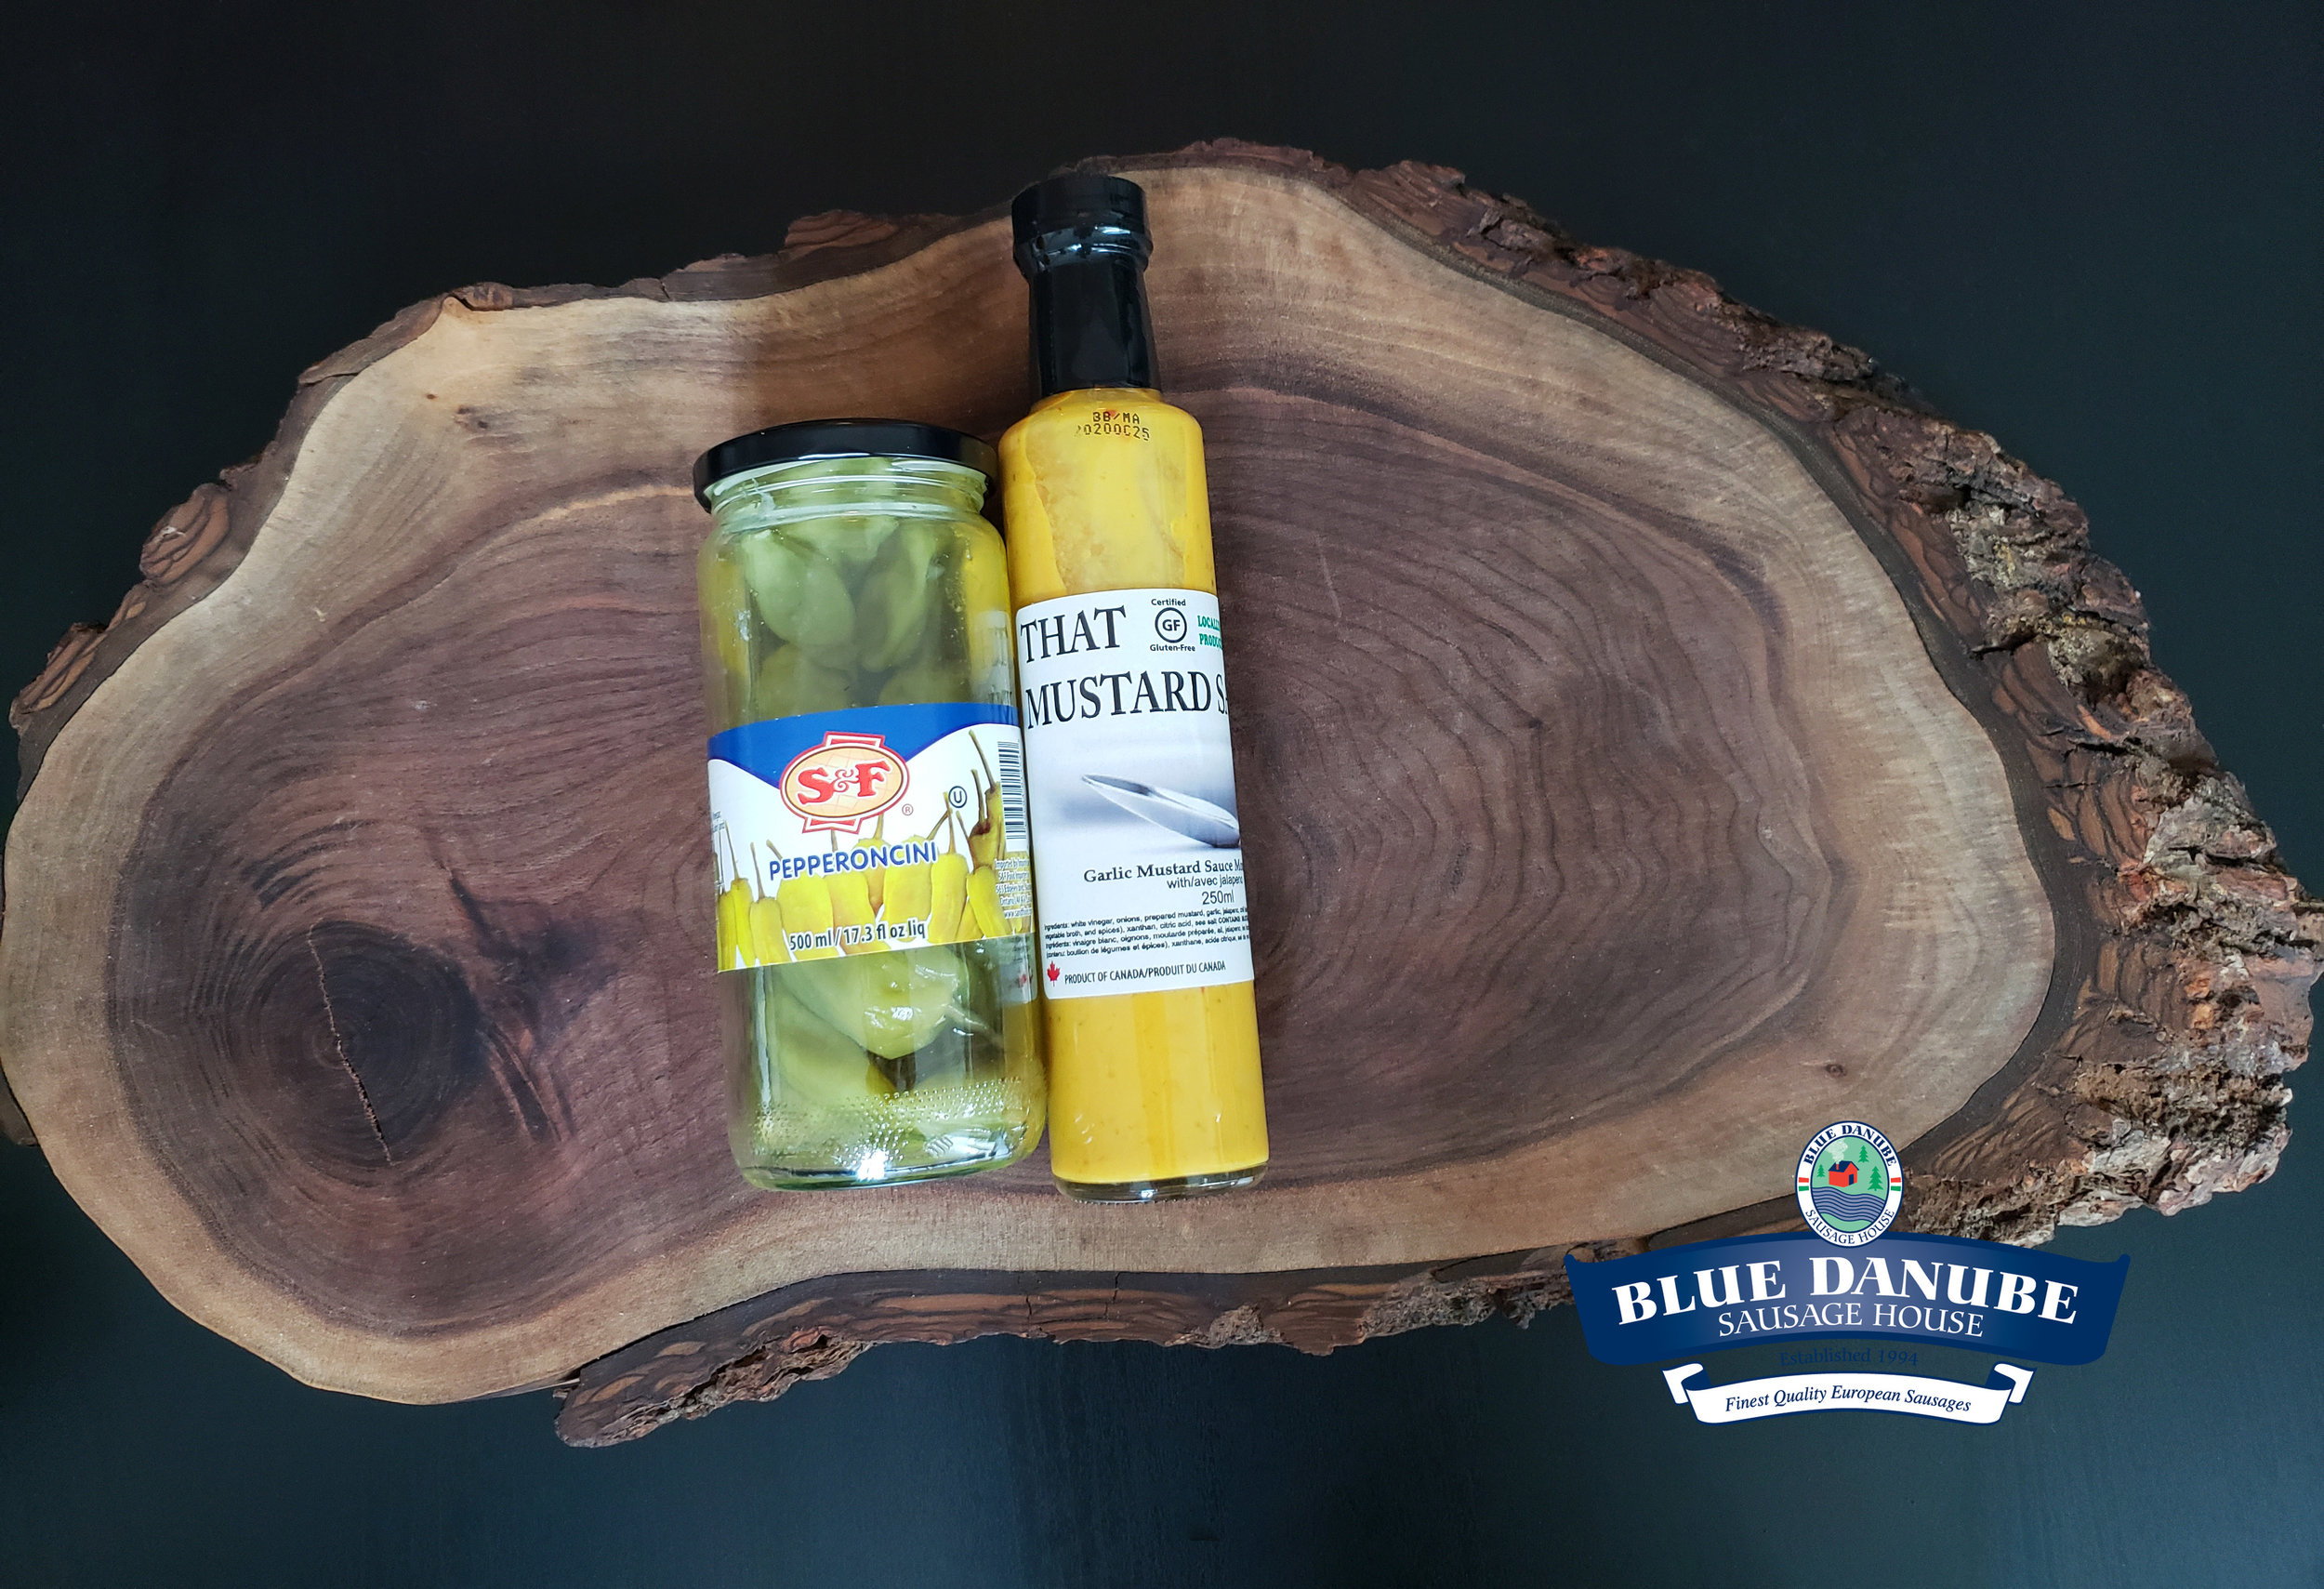
11. Fill one small bowl with That Mustard Sauce and place onto board.

12. Fill one small bowl with Almonds and place onto board.

13. Fill one small bowl with Walnuts and place onto board.

Cheese:

14. Now it’s time to add the cheese!
Cut up Blue Danube Double Smoked Cheddar Cheese into small cubes. Place on board.
Pro Tip: I personally like to group the cheeses on my board based on the type. But, feel free to mix it up if you would like!

15. Cut up Havarti Cheese into small cubes. Place on the board.

16. Open up one small package of Goat Cheese and place onto board.
Pro Tip: When using flavoured Goat Cheese, I like to cut one small slice off the end of the Cheese so that people can see inside of it.
Pro Tip: If you are short for space, you can cut the Cheese in half and place in two spots on the board.

17. Cut up at least 3 wedges of Brie Cheese. Place onto board.

18. If you wish to use Blue Danube Körözött Cream Cheese, fill a small bowl with Körözött and place onto board.

Extras:

19. Now it’s time to add the rest of the ingredients as fillers on the board. The idea for the rest of the ingredients is to fill up space so that you can no longer see the surface area of the board.
Take at least 4 S&F Pepperoncinis and place them onto the board.
Pro Tip: Pepperoncinis are very juicy! I like to make sure that I am placing them directly on the board so that they are not overlapping on any meat. You don’t want juices from other items to start flowing onto the meat.
Pro Tip: I usually put the Pepperoncinis straight onto the board without any modifications. However, if the stems are unusually long, I like to trim them down.

20. Put a large handfull of Green Grapes onto the board. Depending on how much space you have, you can put one or two larger groupings of Grapes and then sprinkle a few grapes throughout the entire board.
Pro Tip: I prefer to take the stems off grapes when I put them onto the board to make it easier to assemble and easier for guests to pick at.
Pro tip: I used Green Grapes for this recipe to add some more colour, but this is totally up to you!

21. Cut up Pickles lengthwise and place onto board.
Pro Tip: Again, I try to make sure that the pickle juice won’t be directly spilling onto my meats.

22. Cut up Orange Bell Pepper into long pieces and place several slices onto the board. You can use any colour of pepper, but I felt that Orange was the best for this recipe.

23. Cut up 1-2 Stalks of Celery and place onto board.

24. Put one handful of Dried Apricots onto your board. Again, you can use any type of Dried Fruit that can bring a sweetness to the board. I chose Dried Apricots because of their beautiful orange colour. I spread them throughout the entire board in small groupings.

25. Serving utensils - Don’t forget to add utensils to help your guests serve themselves more easily! I suggest using at least one small spoon for the That Mustard Sauce and at least 1 small cheese knife for the Brie and Goat Cheese. Add one more cheese knife or small spoon if you are adding Körözött Cream Cheese.

26. Cut up Baguette into thin slices. Lay slices onto a separate serving dish (if it does not fit onto your board).

27. Put crackers out onto the same serving dish as the Baguettes, if they do not fit onto your board.

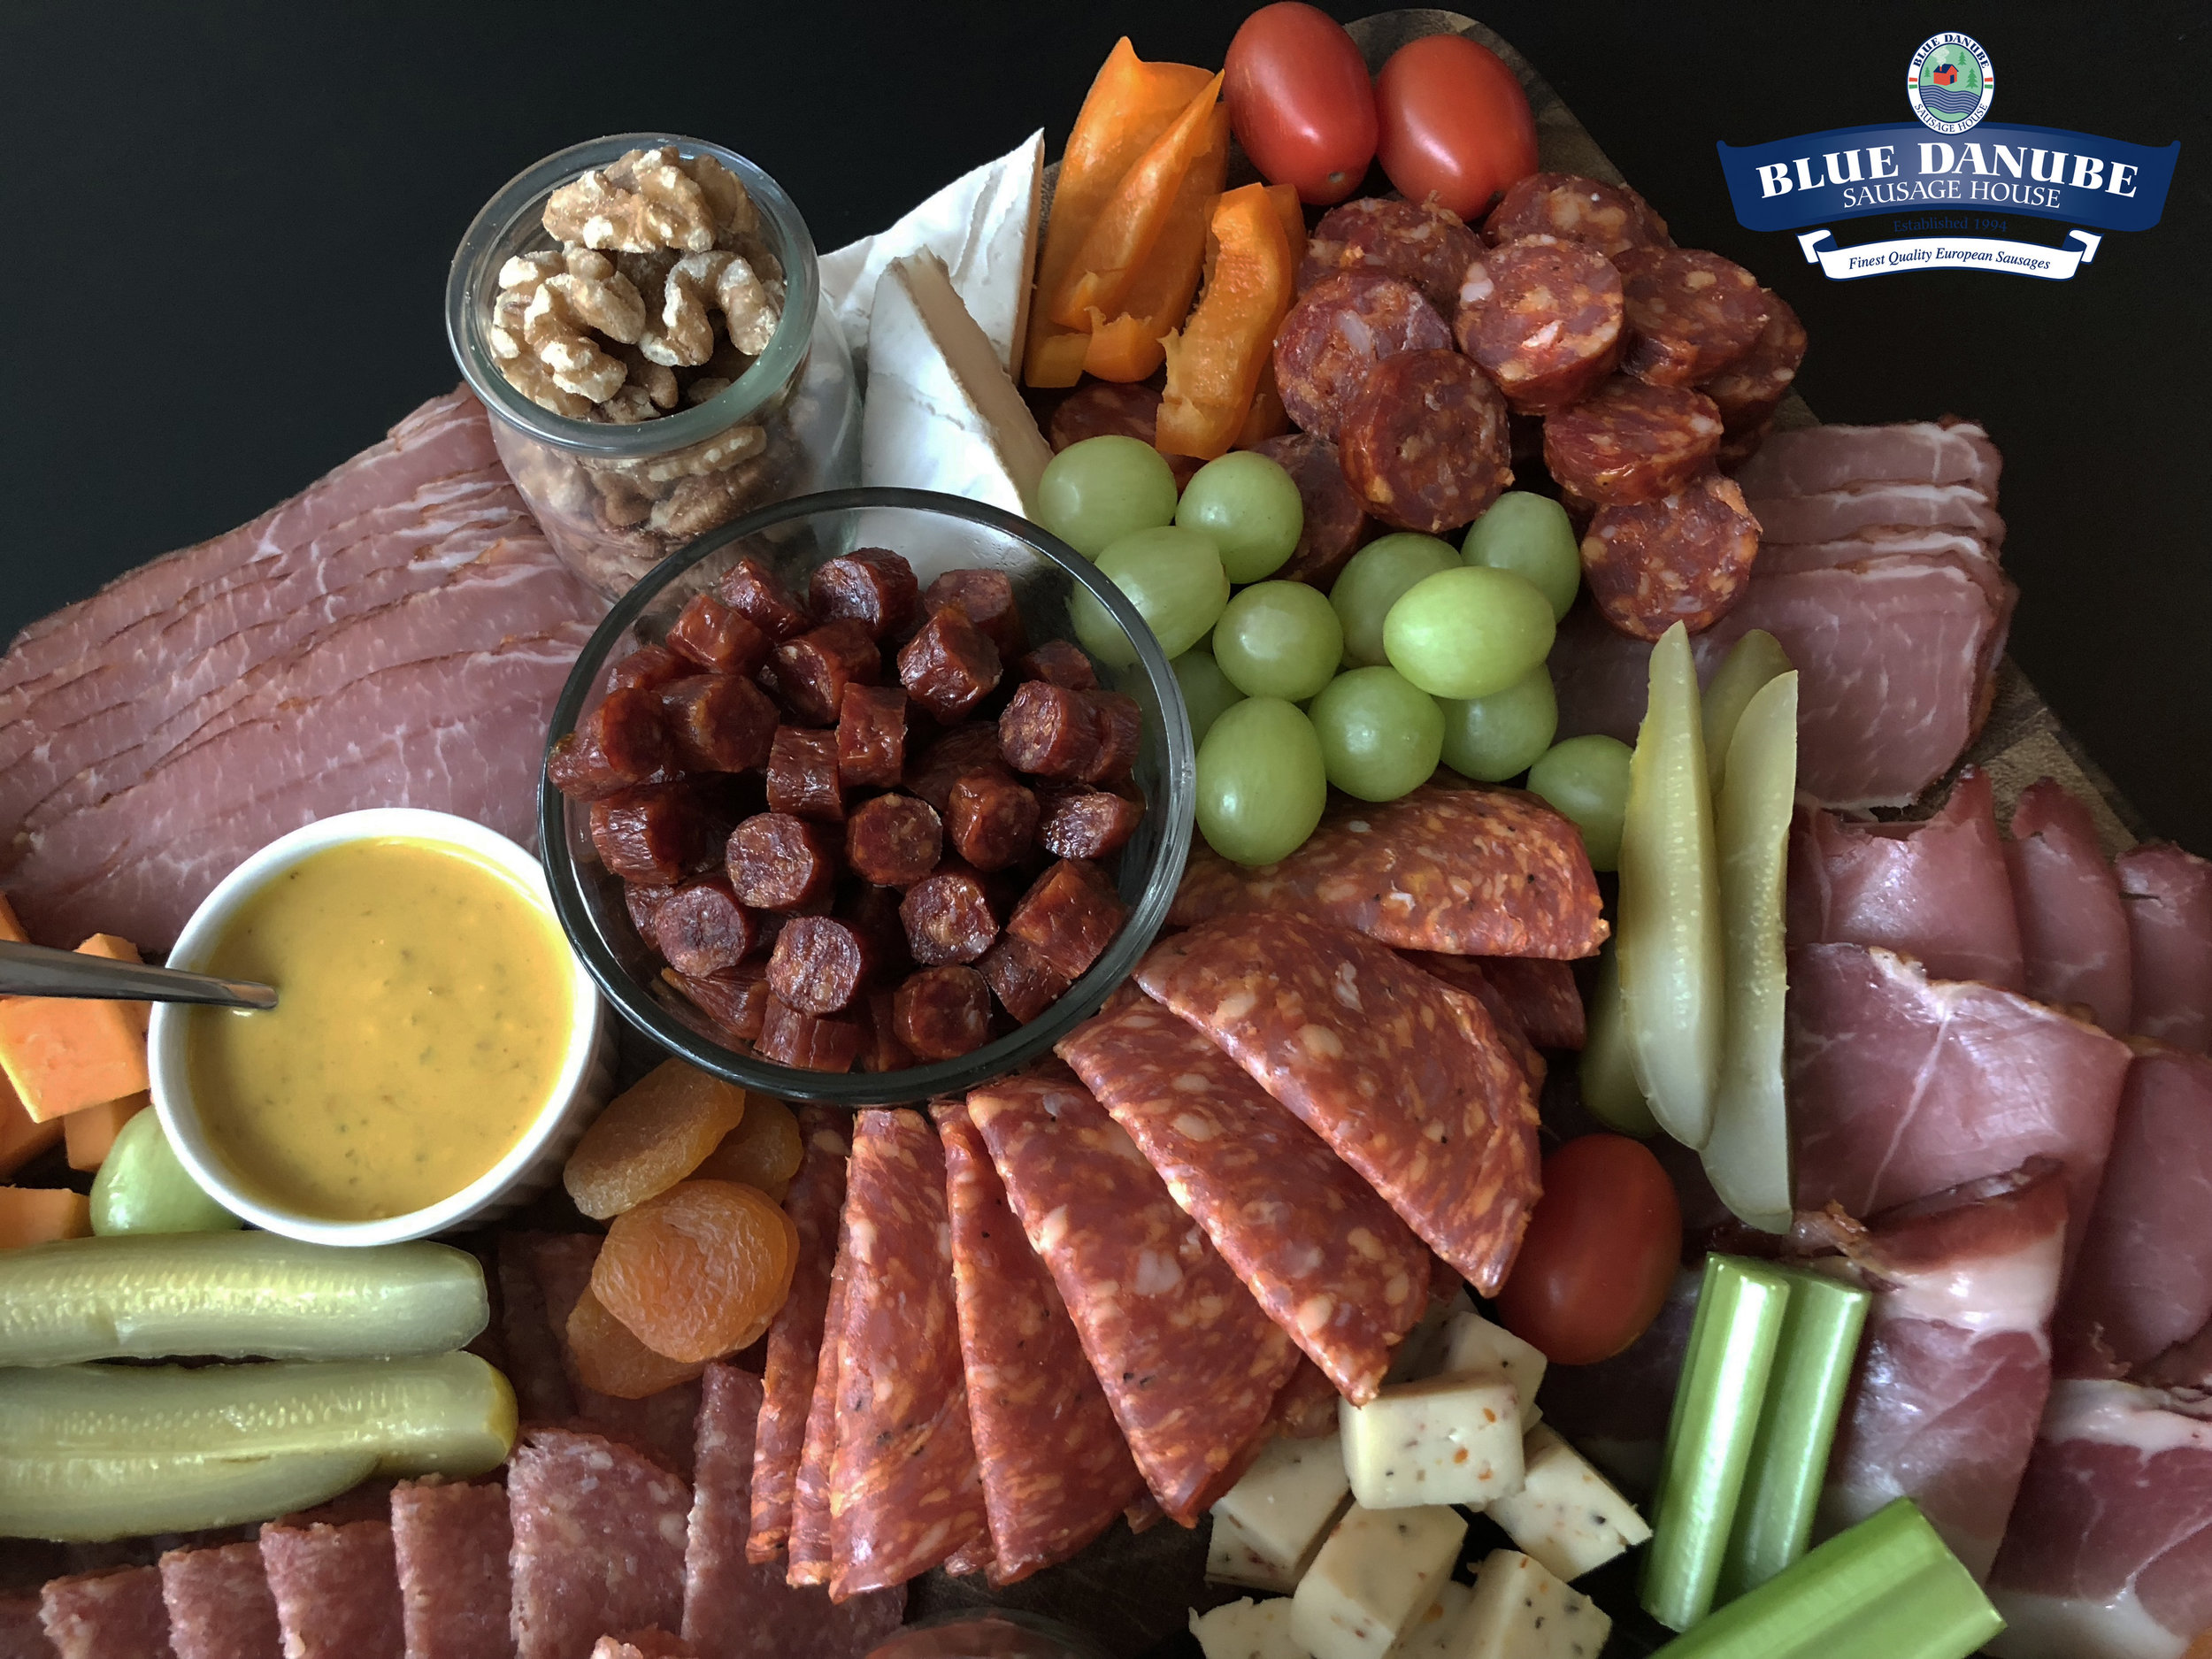
Your Charcuterie Board is now Ready to Serve and Eat!

Your charcuterie board can be made the day before your event or the day of! If making your board the night before, cover with cling wrap and store in fridge. You can also place your entire tray into a large clear box liner bag if you have one available.

If there are extra sliced meat or sausages leftover that were not used (or eaten!), cover and store in the fridge for future use or to replenish the board as it gets eaten.

DCB-4.jpg
DCB-3.jpg
DCB-5.jpg
DCB-6.jpg

How To Make Shinken-Wrapped Asparagus:

Ingredients:

  • Asparagus - Approx. 16 pc

  • Blue Danube Dry Cured Shinken Flat - 1 Package

  • Salt and Pepper

  • Optional: Oil

a-1.jpg

Directions:

1. Pre-heat Oven to 400 F.

2. Wash Asparagus and pat dry.

3. Trim off the bottom two inches of each Asparagus. (The woody stem bits)

4. Open package of Blue Danube Dry Cured Shinken Spec Flat and cut strips down the middle lengthwise.
Pro Tip: I always like to cut my meat in half when wrapping it around items. This always helps it to cook faster and allows the item it is covering to breathe.

5. Wrap Shinken Spec around Asparagus. For my recipe, I wrapped 1 half piece onto each Asparagus. You can feel free to add a second piece if you would like!

6. Place wrapped Asparagus onto a baking tray with tin foil.

7. Optional: Drizzle with oil. I did not do this in my recipe because I like the taste without any oil.

8. Add salt and Pepper.

9. Bake for approx. 25 minutes, or until the Shinken Spec is crispy and is the colour you wish to achieve.

10. Remove from oven and let sit for 2-3 minutes. Place Asparagus onto your Charcuterie Board!

Eat and Enjoy!

Items I Love:

Two items that I absolutely love and that I used in this recipe are the S&F Pepperoncini and That Mustard Sauce by SOSS International.

I highly recommend these items because of their bold flavour and beautiful appearance and both of them are available in our retail store for purchase!

DCB-7.jpg

Thank you and Happy Eating!


Hungarian Pinwheels


Hungarian Pinwheels are a perfect appetizer for any get-together, especially during the Holidays. Easy to make and using all natural ingredients, this recipe will definitely be a crowd pleaser at
your next event!

HUNG PIN - 11.jpg

Ingredients:

  • Blue Danube Mild Csabai Salami
    Substitution: Blue Danube Hot Gyulai Salami, Blue Danube Teli Salami, Blue Danube Csemege Salami (1 package)

  • Blue Danube Heritage Garlic Salami
    Substitution: Blue Danube Heritage Hot Paprika Salami, Blue Danube Heritage Pepperseed Salami (1 package)

  • Blue Danube Homemade Körözött Cheese Spread (1 small container)

  • Blue Danube Lappi Cheese (8 slice)

  • Lavash Bread (1) or Pita Bread (2)

  • Spinach (enough to cover surface area of bread)

HUNG PIN - 13.jpg

Directions:

1. Lay pita out on a serving tray and spread evenly with Blue Danube Homemade Körözött Cheese Spread. Keep Körözött away from all edges except one. The edge with Körözött spread onto it will be your “glue” for holding the wrap together.

Pro Tip: If using a large lavash bread, cut bread into a square shape to make it easier to make the roll.

HUNG PIN - 3.jpg

2. Lay out Lappi cheese slices to cover the Körözött spread. I used 7 slices on my lavash bread.

RECIPE1.jpg

3. Lay out Mild Csabai Salami slices on top of cheese. I used one package of 150 gram pre-sliced Csabai salami.

RECIPE2.jpg

4. Layer Blue Heritage Garlic Salami on top of the Mild Csabai Salami. I used one package of 150 gram pre-sliced Blue Heritage Garlic Salami.

RECIPE3.jpg

5. Put a thick layer of spinach over the Blue Heritage Garlic Salami until fully covered.

RECIPE4.jpg

6. Tightly roll up the pita.

Pro Tip: Have the long edge of the pita where you did not spread Körözött closest to you and start rolling. The opposite end with the Körözött spread right up to the edge will act as a “glue” to hold the roll together once finished.

RECIPE5.jpg

7. Once fully rolled, store the roll inside your fridge for one hour.

RECIPE6.jpg

8. After one hour, cut up the roll into one inch slices.

Pro tip: Using a very sharp knife will make this much easier!

Plate, serve, and enjoy!

I served my Hungarian Pinwheels with a half charcuterie board using:
Blue Danube Dry Cured Pork Neck
Blue Danube Dry Cured Pork Back Bacon
Blue Danube Shinken Spec Flat
Blue Danube Smoked Homemade Ham
Blue Danube Hot Gyulai Sausage
Blue Danube Hot Wild Boar Csabettes
Snow Peas
Peppers
Pickles
Radishes
Green Onions

RECIPE7.jpg
 

Charcuterie Board


A how-to guide to creating the perfect Charcuterie Board for your next event or get-together!

CHAR1.jpg

From holiday parties to casual get-togethers, charcuterie boards are always a crowd-pleasing appetizer to serve your guests! Charcuterie Boards are a self-serve appetizer, which means that your guests are able to get a fully customizable taste experience, while you only need to prep one large tray. Blue Danube Sausage House Ltd. sliced and pre-packed meats are perfect for charcuterie boards as they can be bought ahead of time and they’ll stay fresh until you’re ready to use them.

In this post, I will be exploring two different charcuterie boards, for small and large get-togethers, using a variety of our high quality, all-natural sausages and smoked meats:

  1. Small Charcuterie Board - 2-3 people or 5-8 people

  2. Large Charcuterie Board - 12-15 people


Small Charcuterie Board (5 meats + extras)
Feeds 3-8 people

SMALL CHARCUTERIE2.jpg

Ingredients:

  • Blue Danube Mild Csabai Salami - 1 package
    Substitution: Blue Danube Hot Gyulai Salami, Blue Danube Teli Salami

  • Blue Danube Dry Cured Pork Back Bacon - 1 package

  • Blue Danube Flat Pork Shinken - 1 package

  • Blue Danube Hot Gyulai Sausage - 1 piece
    Substitution: Blue Danube Mild Csabai Sausage, Blue Danube Double Garlic Csabai Sausage

  • Blue Danube Hot Wild Boar Csabettes - 2 pieces
    Substitution: Blue Danube Pork Csabettes (Mild, Hot, Garlic, Jalapeño or Peppercorn), Blue Danube Chicken Csabettes (Mild, Hot), Blue Danube Beef Csabettes (Mild, Hot), Blue Danube Mild Turkey Csabettes, Blue Danube Mild Wild Boar Csabettes, Blue Danube Elk Csabettes (Mild, Hot), Blue Danube Kangaroo Csabettes (Mild, Hot), Blue Danube Venison Csabettes (Mild, Hot), Blue Danube Water Buffalo Csabettes (Mild, Hot)

  • Blue Danube Double Smoked Cheddar Cheese - One piece approx. 100 grams

  • Pretzels - 1 package

  • Radishes - 3 large

  • Pickles - 2 large

  • S & F Pepperoncini - 4-8pcs

  • Brie Cheese - 2 small triangles

  • Blue Cheese - 3 inch slab

  • Green Onions - 2-3 stalks cut up
    Optional: additional 3 green onion stalks, uncut

SMALL CHARCUTERIE3.jpg

Directions:

1. Select a display board for your charcuterie board. The size of the display board will dictate the amount of people that it can serve.

As seen below, the small charcuterie board recipe can feed either 3-4 people or 5-8 people, based on the size of the board it is on. Remember to adjust the quantity of the ingredients to suit your display board!

Small Charcuterie Board #1 - Feeds 3-4 peopleUsing 1/2 package of all sliced meat products, 1 piece Wild Boar Csabettes, 1 piece Hot Gyulai Sausage

Small Charcuterie Board #1 - Feeds 3-4 people

Using 1/2 package of all sliced meat products, 1 piece Wild Boar Csabettes, 1 piece Hot Gyulai Sausage

Small Charcuterie Board #2 - Feeds 5-8 peopleUsing full packages of all sliced meat, 2 pieces Wild Boar Csabettes, 1 piece Hot Gyulai Sausage

Small Charcuterie Board #2 - Feeds 5-8 people

Using full packages of all sliced meat, 2 pieces Wild Boar Csabettes, 1 piece Hot Gyulai Sausage

Meat Products:

2. Open packages of Blue Danube Dry Cured Back Bacon, Blue Danube Csabai Salami, and Blue Danube Flat Pork Shinken and lay down on your board. Use either half or full packages depending on how many people you wish to serve.

Pro Tip: How to Display Products
Csabai Salami - Either folded in half or laid out flat, depending on how much space and product you have. On my smaller board, I laid them flat since I used less product. On the larger board, I folded them in half as I wanted to serve more.
Flat Shinken - Lay out flat and layer.
Dry Cured Back Bacon - Fold in half and layer.

3. Open packages of Blue Danube Hot Wild Boar Csabettes and Blue Danube Hot Gyulai Sausage. Use 1 whole piece of Hot Gyulai Sausage and 1 or 2 pcs of Hot Wild Boar Csabettes.

Pro Tip: How to Display Products
Csabettes - Cut up into 1 cm pieces and place on board. If you have a small bowl, you can place it on the board and put the Csabettes inside.
Hot Gyulai Sausage - Cut the sausage diagonally into slices and layer on the board.

Extras to Add to the Charcuterie Board:

4. 2-3 pickles, cut up into slices or spears.

5. Brie cheese, cut 2 small wedges.

6. Blue cheese, cut a 2-3 inch piece. Make sure that you include a knife for cheeses!

7. Blue Danube Double Smoked Cheddar Cheese, cut into cubes.

8. Snow peas, arrange about 5-10 pieces.

9. Green onions, 2-3 stalks cut into small pieces.
Optional: Place 2-3 uncut green onion stalks onto the board as well.

10. Pepperoncini, 3-6 pieces.

11. Pretzels, add several pretzels to the board or place them in a side bowl/tray to be placed beside the charcuterie board. Optional: Add slices of baguette or add crackers and place them on beside the board.

12. Radishes, select 3-5 large pieces.
Pro Tip: Cut radishes into roses as shown below.

Your Charcuterie Board is now ready
to serve and eat!

Your charcuterie board can be made the day of or the day before your event. If making your board the night before, just cover with plastic wrap or a lid and store in the fridge.

If there are extra sliced meat or sausages left over that weren’t used (or eaten!), cover and store them in the fridge for future use.


radish1.jpg

How to Cut Radishes into Roses

Steps:
1. Cut a bit of the top and bottom off radishes to create a flat surface on each side.

2. Lay radish down on flat side. Using a sharp knife, make a light incision on the right side of the radish.

radish 2.jpg

3. Rotate the radish counter clockwise slightly and make the same incision.

4. Keep rotating counter clockwise and making small incisions until the entire radish is evenly cut. Your rose is now ready!


Large Charcuterie Board (8 meats + extras)
Feeds 12-15 people

LARGE CHARCUTERIE1.jpg

Ingredients:

  • Blue Danube Mild Csabai Salami - 1 package
    Substitution: Blue Danube Hot Gyulai Salami, Blue Danube Teli Salami

  • Blue Danube Dry Cured Pork Back Bacon - 1 package

  • Blue Danube Flat Pork Shinken - 1 package

  • Blue Danube Dry Cured Pork Neck - 1 package

  • Blue Danube Heritage Garlic Salami - 1 package

  • Blue Danube Smoked Homemade Ham - 1 package

  • Blue Danube Smoked Homemade Ham - 1 package

  • Blue Danube Hot Gyulai Sausage - 1 - 1.5 pieces
    Substitution: Blue Danube Mild Csabai Sausage, Blue Danube Double Garlic Csabai Sausage

  • Blue Danube Hot Wild Boar Csabettes - 2-4 pieces
    Substitution: Blue Danube Pork Csabettes (Mild, Hot, Garlic, Jalapeño, Peppercorn), Blue Danube Chicken Csabettes (Mild, Hot), Blue Danube Beef Csabettes (Mild, Hot), Blue Danube Mild Turkey Csabettes, Blue Danube Mild Wild Boar Csabettes, Blue Danube Elk Csabettes (Mild, Hot), Blue Danube Kangaroo Csabettes (Mild, Hot), Blue Danube Venison Csabettes (Mild, Hot), Blue Danube Water Buffalo Csabettes (Mild, Hot)

  • Blue Danube Double Smoked Cheddar Cheese - One piece, approx. 200 grams

  • Pretzels - 1 package

  • Radishes - 3-5 large

  • Pickles - 2-3 large

  • S & F Pepperoncini - 8 pieces

  • Brie Cheese - 2 small wedges

  • Blue Cheese - 3 inch piece

  • Green Onions - 3 stalks cut up, optional: additional 3 stalks, uncut

LARGE CHARCUTERIE3.jpg

Directions:

1. Choose a display board large enough to serve 12-15 people. Remember to adjust the quantity of the ingredients to suit your display board!

Meat Products:

2. Open packages of Blue Danube Dry Cured Back Bacon, Blue Danube Dry Cured Pork Neck, Blue Danube Csabai Salami, Blue Danube Heritage Garlic Salami, Blue Danube Homemade Smoked Ham and Blue Danube Flat Pork Shinken and place on your board. Use either half or full packages depending on how many people you’d like to serve.

Pro Tip: How to Display Products
Csabai Salami - Either folded in half or laid out flat, depending on the amount of space and the number of products you have. On my smaller board, I laid them flat since I used less product. On the larger board, I folded them in half as I had more to put out.
Heritage Salami - Fold in half and layer.
Flat Shinken - Lay out flat.
Dry Cured Back Bacon - Fold in half and layer.
Dry Cured Neck - Lay flat and layer.
Smoked Homemade Ham - Roll up and layer on the board.

3. Open packages of Blue Danube Hot Wild Boar Csabettes and Blue Danube Gyulai Sausage. Use 1 whole piece of Hot Gyulai Sausage and 2-4 pieces of Hot Wild Boar Csabettes.

Pro Tip: How to Display Products
Csabettes - Cut up into small pieces and place on board. If you have a small bowl, place the bowl on the board and put the Csabettes inside.
Hot Gyulai Sausage - Cut diagonal slices into Sausage and layer on board.

Extras to Add to the Charcuterie Board:

4. Pickles, 3-4 pieces cut into slices or spears.

5. Brie, 2 small wedges.

6. Blue Cheese, 2-3 inch piece.

NOTE: Make sure that you include a knife for cheeses!

7. Blue Danube Double Smoked Cheddar Cheese, cut into cubes.

8. Snow Peas, 10-12 pieces.

9. Green onions, 3 stalks cut into small pieces. Optional: Place 3 uncut green onion stalks onto board as well.

10. Pepperoncini, 6-8 pieces.

11. Pretzels, add several pretzels to the board or place them in a side bowl/tray to be placed next to the charcuterie board. Optional: Add slices of baguette or add crackers and place them on beside the board.

12. Radishes, 3-5 large pieces. If desired, cut into roses as shown above, and place on the board.

Your Charcuterie Board is now ready
to serve and eat!

Your charcuterie board can be made the day before your event or the day of! If making your board the night before, cover with cling wrap and store in fridge.

If there are extra sliced meat or sausages leftover that were not used (or eaten!), cover and store in the fridge for future use.